
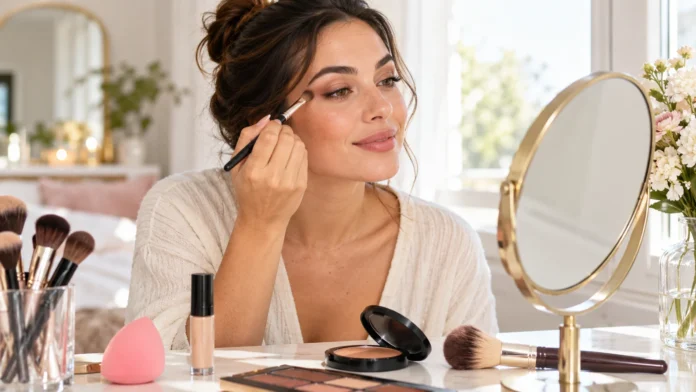

Start With Skin Prep for Smoother Makeup
One of the most useful makeup hacks is preparing your skin before reaching for foundation. Cleanse gently, apply moisturizer suited to your skin type, and give it a few minutes to settle. Makeup tends to blend more evenly when skincare has absorbed, while a rushed or overly slippery base can make products shift.
Use primer only where it serves a purpose. A smoothing primer may help soften the look of pores around the nose, while a hydrating formula can feel comfortable on drier areas. You do not need to apply primer everywhere; a thin layer in specific spots can help makeup sit better without adding unnecessary product.
If your skin looks shiny before makeup, blot gently instead of applying more skincare or powder right away. When lips feel dry, use a small amount of balm while doing the rest of your routine, then blot before lipstick. These simple prep steps can help foundation, concealer, and lip color look more even.
Apply Foundation in Thin, Even Layers
Starting with less foundation is an easy way to avoid a heavy or cakey finish. Dot a small amount around the center of your face, where redness or uneven tone may be more noticeable, then blend outward. You can add another light layer only where you still want coverage.
A damp makeup sponge can help press liquid or cream foundation into the skin for a soft finish. A brush may give more coverage, while clean fingertips can work well with lightweight skin tints. Whichever tool you use, blend around the jawline and hairline so there are no visible edges.
Check your foundation in natural light before deciding whether you need more. Indoor lighting can make a shade or coverage level look different than it does outside. If your skin shows through in places, that is not necessarily a flaw; a realistic, even complexion often looks more polished than a thick layer of makeup.
Use Concealer Where It Makes a Difference
Concealer works best when you apply it only to areas that need extra coverage. Use a small amount under the eyes, around the sides of the nose, or over a blemish, then tap the edges with a sponge or fingertip. Placing product precisely helps keep the overall makeup lightweight.
For under-eye concealer, look slightly upward and apply a few small dots where darkness is most visible. Blend gently without dragging the delicate skin, and avoid layering too much product into fine lines. If you want a brighter look, choose a shade only slightly lighter than your foundation so it does not appear stark.
When covering a blemish, use a small brush to place concealer directly on the spot and blend only around its edges. This leaves more coverage in the center instead of moving the product away. Letting the concealer sit briefly before blending may also help it stay in place, especially when you use a creamy formula.
Shape Brows Without Making Them Look Harsh
Brows frame the face, but they do not need to be perfectly identical to look groomed. Brush the hairs upward and outward first, then fill sparse areas with short, light strokes. A pencil or powder close to your natural brow color can add definition without creating a blocky shape.
If your brow pencil looks too strong, use a clean spoolie to soften the color and distribute it through the hairs. Concentrate product where the brow appears sparse, and keep the front edge lighter than the arch and tail. This gradual effect can make filled-in brows look more natural.
A clear or tinted brow gel can help hold hairs in place after you shape them. Apply a small amount and brush in the direction the hairs naturally grow, using extra care near the front of the brow. If gel leaves a shiny or stiff finish, comb through once more with a clean spoolie.
Make Eye Makeup Easier to Blend
An even eyelid base can help eyeshadow blend more smoothly. Apply a thin layer of eye primer or concealer, then set it lightly with a neutral powder if your lids crease easily. Too much base product may make shadow harder to blend, so use only enough to create an even surface.
For a simple eye look, apply a light neutral shade over the lid and a slightly deeper shade through the crease. Blend the edges with a clean brush using small circular or windshield-wiper motions. If the color looks too intense, soften it with a little of the lighter shade instead of adding more dark shadow.
To brighten the inner corner, tap on a small amount of light shimmer or satin eyeshadow. Keep the placement compact so it catches light without spreading across the entire lid. If you wear glasses or have smaller lids, a soft highlight and well-blended crease color can add definition without making the makeup feel crowded.
Create Cleaner Eyeliner and Fuller-Looking Lashes
For steadier eyeliner, rest your elbow on a table and look slightly downward into a mirror. Draw a series of short strokes close to the lash line rather than trying to make one long, perfect line. You can connect the strokes and gently smooth any gaps with a small angled brush.
If you want a wing, use the lower lash line as a guide for the direction of its outer edge. Make a small mark first, then connect it to the upper lash line with a thin stroke. Keeping the wing modest can make it easier to match both eyes and adjust the shape if needed.
To reduce mascara clumps, wipe excess product from the wand before applying it. Wiggle the brush gently at the roots, then sweep upward through the lashes; a second light coat can add definition. Let the first layer become slightly tacky before adding more, and avoid pumping the mascara wand, which can dry the formula faster.
Add Dimension With Blush, Bronzer, and Highlighter
Blush can bring a fresh look to the complexion when placed and blended with care. Smile gently if that helps you locate the apples of your cheeks, then blend the color upward toward the temples. Cream blush can melt into a dewy base, while powder blush may feel easier to layer over a set foundation.
Bronzer adds warmth, while contour makeup creates the appearance of shadow, so they serve different purposes. For a natural result, sweep bronzer lightly where the sun might warm your face, such as the forehead and upper cheeks. If you use contour, blend it carefully beneath the cheekbones rather than drawing a strong stripe.
Highlighter usually looks most natural when applied sparingly to areas that catch light. Try a small amount on the tops of the cheekbones or the bridge of the nose, then blend the edges. If you have visible texture, avoid concentrating shimmer directly over it, since reflective products can make that area stand out more.
Make Lipstick Look Neater and Last Longer
For a smoother lipstick application, start with comfortable lips rather than dry, flaky skin. Gently buff away loose flakes with a damp washcloth and apply a thin layer of balm. Blot off excess balm before adding color so lipstick is less likely to slide beyond the lip line.
A lip liner close to your natural lip color can define the edges without looking like a separate outline. Trace the shape with short strokes, then shade lightly toward the center before applying lipstick. If you want a fuller-looking effect, keep any overlining subtle and close to your actual lip border.
To help lipstick wear more evenly, blot once with tissue after the first layer and apply a second thin coat. If you use gloss, place a little at the center of the lips rather than sweeping on a thick layer. Keep your lipstick with you for touch-ups, since eating and drinking can naturally wear down color.
Set Makeup Without Losing a Natural Finish
Setting powder can help reduce shine and keep makeup from moving, but more is not always better. Use a fluffy brush to apply a small amount where makeup tends to crease or become shiny, such as around the nose or under the eyes. Leave the areas that already look comfortable without extra powder.
If you prefer a dewy finish, focus powder only on the center of the face and leave the outer cheeks more luminous. For oily skin, you may want to set a wider area, but apply powder in light layers. Pressing too much product into the skin can emphasize dryness or texture.
Setting spray can help the layers of makeup look more cohesive. Hold the bottle at a comfortable distance, mist lightly, and let the spray dry without touching your face. Use a formula you have tried before an important event, because skin types and product finishes vary.
Use Makeup Tools and Products More Effectively
Clean brushes and sponges help makeup apply more evenly and make it easier to control how much product you use. Wash tools regularly with a gentle cleanser, rinse thoroughly, and let them dry completely before storing them. A clean sponge can also help lift excess foundation when the base feels too heavy.
You do not need a separate brush for every product. A small collection of clean, versatile tools can handle foundation, blending, blush, and brows. If you switch between shades or products, wipe the brush on a clean towel or use a designated color-switching surface to reduce muddy color mixing.
Use makeup products for their intended purpose, especially around the eyes. Do not share mascara, eyeliner, or lip products, and avoid using products that have changed in smell, texture, or appearance. These practical habits keep your routine more hygienic and help you get a cleaner result from the products you already own.
Adapt Makeup Hacks to Your Skin and Routine
A makeup hack is useful only when it works for your skin, products, and preferences. If your skin is dry, you may prefer cream blush and less powder; if it becomes oily, strategic setting may feel more comfortable. Test one adjustment at a time so you can tell what actually improves your routine.
Consider how much time you have before choosing a technique. For a quick everyday look, focus on even skin, groomed brows, mascara, and a comfortable lip color. When you have more time, add eyeshadow, liner, or extra complexion detail without feeling that every step is necessary.
Practice unfamiliar techniques before an important event instead of trying them for the first time as you get ready. Take a photo in daylight and check how the makeup looks from a normal distance. You can then adjust placement, shade, or product amount until the result feels flattering and easy to wear.
Conclusion: Keep the Hacks That Work for You
The best beauty makeup hacks make your routine easier, help products apply more smoothly, or create a finish you enjoy wearing. Skin prep, light foundation layers, precise concealer, blended color, and thoughtful setting can all make a difference without requiring a large makeup collection.
Use each tip as a starting point rather than a strict rule. Skin types, face shapes, products, and personal preferences vary, so a technique that works for one person may need adjusting for another. Test changes gradually and keep the steps that feel comfortable and give you the result you want.
A polished makeup look does not depend on using every product or following every trend. Choose a few reliable techniques, keep your tools clean, and give yourself enough time to blend. With a little practice, small makeup adjustments can help you feel more confident in your everyday routine.
FAQs About Beauty Makeup Hacks
What is the easiest makeup hack for beginners?
Apply foundation in thin layers and blend it outward from the center of your face. Use concealer only where needed, then add a little blush and mascara for a quick, balanced look.
How can I make foundation look less cakey?
Start with moisturized skin, use a small amount of foundation, and build coverage gradually. Blend with a clean sponge or brush, then powder only the areas that tend to get shiny.
How do I stop mascara from clumping?
Wipe excess mascara from the wand before applying it and use light strokes from the lash roots upward. Let the first coat become slightly tacky before adding another thin layer.
How can I make lipstick last longer?
Apply liner across the lips, add a thin layer of lipstick, blot gently, and apply a second coat. Carry your lipstick for touch-ups after meals or drinks.
Do I need primer for makeup?
No. Primer is optional and depends on your skin and the finish you want. Use it only where it helps makeup feel smoother or last better, and choose a formula suited to your skin.