
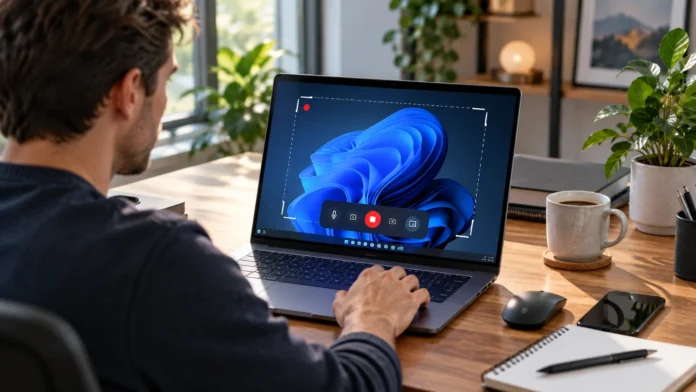

Recording your screen on Windows 11 is useful when you need to create tutorials, demonstrate software, capture gameplay, explain a technical problem, or save an important online presentation. You do not necessarily need expensive recording software because Windows includes built-in tools that can handle many common screen recording tasks quickly and conveniently.
Windows 11 gives users several ways to capture video from their screens. Snipping Tool is useful for recording a selected area, Xbox Game Bar works well for recording applications and games, while Microsoft Clipchamp provides additional recording and editing options. Choosing the right method depends on what you want to capture and how much editing you need afterward.
This guide explains how to record your screen on Windows 11 step by step. You will learn how to use built-in screen recording tools, capture audio, find saved recordings, improve video quality, troubleshoot common problems, and choose the best method for tutorials, meetings, gaming, and everyday computer tasks.
Use Snipping Tool to Record Your Screen
Snipping Tool is one of the easiest built-in ways to record part of your screen on Windows 11. Open Snipping Tool from the Start menu, select the Record option, and choose New. You can then drag over the exact section of the screen you want to capture before starting the recording.
Windows also provides a convenient keyboard shortcut for opening the screen recording interface. Press Windows key + Shift + R, select the area you want to record, and then begin capturing your activity. This is useful when you need to quickly demonstrate a setting, browser action, software feature, or other short process without opening a more advanced video application.
When you have finished, select Stop and review the recorded clip. Snipping Tool allows you to save the recording or move it into Clipchamp when additional editing is needed. This makes it particularly convenient for users who want a simple recording workflow without installing separate third-party screen capture software.
Record Your Screen With Xbox Game Bar
Xbox Game Bar is another built-in Windows 11 recording option and is especially convenient for games and individual applications. Open the program or game you want to capture, then press Windows key + G to display Game Bar. From there, you can access its Capture controls and begin recording your current application.
For faster recording, press Windows key + Alt + R while the application you want to capture is active. The recording begins without requiring you to navigate through several menus. When you are finished, press the same shortcut again to stop, making this method particularly convenient for capturing spontaneous gameplay or demonstrating an app.
Game Bar is designed primarily around recording applications rather than functioning as a complete desktop video production tool. If you need to select a precise rectangular region or create a polished tutorial with editing, another tool may be more appropriate. However, for quick application captures, its keyboard shortcuts make the recording process extremely fast.
How to Record Screen and Audio Together
Audio can make a screen recording much more useful, particularly when creating tutorials or explaining what is happening on screen. Before recording, decide whether you want to capture system sounds, microphone narration, or both. Your choice depends on whether viewers need to hear application audio, your explanation, or a combination of the two.
Xbox Game Bar lets you manage microphone and system audio through its recording controls. You can also toggle your microphone while recording with Windows key + Alt + M. Checking these settings before beginning prevents the frustrating situation of finishing a detailed tutorial only to discover that your voice or application audio was never captured.
When recording narration, use a quiet room and position your microphone at a comfortable distance. Speak clearly and avoid touching the microphone or moving noisy objects near it. Recording a short test clip before starting a long tutorial can help you confirm that your voice, system audio, and screen activity are all being captured properly.
Record Your Screen With Microsoft Clipchamp
Microsoft Clipchamp provides a more complete option when you want to record and edit video in the same workflow. Depending on the version and account you use, Clipchamp can capture your screen and support additional video production features. It is particularly useful for presentations, explainers, training material, and content that needs polishing after recording.
Screen recording options can allow you to choose what you want to share, such as an entire screen, application window, or supported browser content. This flexibility makes Clipchamp useful when you do not want unrelated windows or notifications appearing in the recording. Selecting only the relevant area also makes the finished video easier for viewers to follow.
After recording, Clipchamp can help you trim unnecessary sections, reorganize clips, add text, work with audio, and prepare the video for sharing. This makes it more suitable than a basic recorder when you want a finished presentation rather than a raw screen capture. Beginners can still use only the essential tools and ignore more advanced editing options initially.
Choose the Right Recording Area
Before pressing Record, decide exactly what viewers need to see. Recording the entire display may be unnecessary when your tutorial focuses on one small application or browser section. A carefully selected recording area reduces distractions and can also prevent private notifications, desktop files, or unrelated applications from accidentally appearing in your video.
Snipping Tool is particularly useful when you want to select a specific rectangular area of the screen. This can work well for tutorials involving software settings, website demonstrations, dashboards, or small application panels. Selecting a clean recording area also makes your final video appear more focused and professional without requiring extensive editing afterward.
If you need to move between several applications during the recording, capturing a larger area may be more practical. Prepare everything before you begin by opening the required programs and closing unrelated windows. A few minutes of preparation can prevent awkward pauses and reduce how much trimming or editing you need to perform later.
Prepare Your Windows 11 Screen Before Recording
A clean screen makes a recording easier to understand. Close unnecessary browser tabs, messaging applications, unrelated documents, and programs that might produce distracting notifications. If you are creating a tutorial, arrange windows in the order you expect to use them so you are not searching for files while viewers wait.
Turn off or temporarily silence unnecessary notifications before beginning an important recording. A private email preview or chat notification can accidentally become part of the final video if it appears during capture. Check your desktop as well and move any confidential files or folders out of view before recording the entire screen.
It is also useful to rehearse what you plan to demonstrate. Walk through the process once without recording and identify any confusing steps. A quick rehearsal helps you speak more naturally, move the cursor with greater purpose, and avoid repeatedly going backward because you forgot what you intended to show next.
Know When a Screenshot Is Better Than a Recording
Not every computer task requires a video. If you only need to show one setting, error message, confirmation screen, or small visual detail, a screenshot may communicate the information faster. Static images are easier to share, take up less storage space, and allow the viewer to examine one important moment without playing a video.
Windows 11 provides several screenshot options alongside screen recording tools. If your task only requires a still image, learning how to take a Windows 11 screenshot can save time and keep your explanation simpler. Use video when movement, timing, or a sequence of steps is genuinely important.
You can also combine screenshots and recordings depending on the project. A tutorial might use a short recording for a complicated process while using screenshots for settings that remain unchanged. Choosing the right format for each piece of information keeps educational content clearer and prevents unnecessarily long videos.
Find Your Screen Recordings After You Finish
One of the most common beginner problems is successfully recording a video but not knowing where Windows saved it. The location depends on the recording method you used. Xbox Game Bar recordings are typically stored as MP4 files inside the Captures folder within your Videos directory.
Snipping Tool lets you review the video after recording and save it to an appropriate location. Choose a folder you can remember rather than randomly saving every clip to Downloads or the desktop. Creating a dedicated Screen Recordings folder can make files easier to organize when you regularly produce tutorials or demonstrations.
Rename important recordings immediately using descriptive file names. Instead of leaving a generic automatic name, use something such as “Windows-Settings-Tutorial” or “Software-Demo-May.” Clear naming becomes particularly useful when you accumulate dozens of recordings and need to locate a specific clip several weeks or months later.
Improve the Quality of Your Screen Recordings
Good screen recording quality is not only about resolution. Viewers also need readable text, smooth movement, clear narration, and a screen layout that is easy to follow. Before recording, increase important text or application zoom slightly if interface elements appear too small when viewed inside a video player.
Cursor movement should also be deliberate. Avoid rapidly circling the mouse around the screen or repeatedly moving between unrelated areas. Pause briefly over buttons and settings you are discussing so viewers can understand where they should click. Slower, purposeful movement can make even a simple recording feel significantly more professional.
Audio quality can matter even more than perfect visual quality when creating educational content. Reduce background noise, maintain consistent speaking volume, and avoid playing loud system sounds over your narration. If the recording is important, create a short sample first and listen to it with headphones before recording the complete presentation.
Reduce Screen Recording File Size
Screen recordings can consume significant storage space, especially when videos are long or captured at high quality. Record only the section you actually need instead of leaving the recorder running during long periods of inactivity. Shorter, focused recordings are easier to store, upload, edit, and watch.
After recording, trim unnecessary sections at the beginning and end. You can also remove pauses, mistakes, and repeated explanations using a video editor such as Clipchamp. Reducing unnecessary footage often lowers file size while making the finished content more engaging for viewers who want information quickly.
If you create recordings regularly, monitor the available storage on your computer. Old raw recordings can accumulate without you noticing and eventually consume many gigabytes. Keep finished videos you still need, move archives to another storage location, and delete unnecessary test clips once you are confident the final recording has been saved correctly.
Fix Screen Recording Problems on Windows 11
If a recording tool does not work, begin by checking whether Windows and the relevant application are updated. Restarting the computer can also resolve temporary problems involving recording controls, audio devices, or application permissions. Avoid immediately installing another recorder before determining whether a simple Windows setting is causing the problem.
When Xbox Game Bar fails to open or record, check its Windows settings and confirm that the feature is enabled. If your microphone is missing from a recording, verify that the correct input device is selected and that necessary microphone permissions are available. Testing with a short recording makes troubleshooting much faster.
If Snipping Tool does not show screen recording features, check for application and Windows updates. Microsoft introduced screen recording into Snipping Tool for Windows 11, so outdated installations may behave differently. Updating through normal Windows and application update channels can restore features that are missing from older versions.
Choose the Best Windows 11 Screen Recorder for Your Needs
Snipping Tool is a strong choice for quick recordings of a selected area. It requires little setup and works well when you want to demonstrate a short sequence without producing a complex video. For many beginners, it provides the simplest introduction to screen recording because the interface is familiar and straightforward.
Xbox Game Bar is particularly useful when recording games or activity inside an application. Its keyboard shortcuts allow you to start and stop quickly without leaving what you are doing. It is a practical option when you value speed and do not need extensive editing controls during the recording process.
Clipchamp is better suited to projects that need editing after capture. Tutorials, educational videos, business demonstrations, and presentations may benefit from trimming, captions, audio adjustments, or additional visual elements. Instead of searching for one recorder that does everything perfectly, choose the Windows tool that best matches the type of content you want to create.
Conclusion
Recording your screen on Windows 11 is straightforward once you understand the built-in options. Snipping Tool works well for capturing a selected region, Xbox Game Bar provides convenient application and gaming recording, and Clipchamp offers additional tools when you need to edit and polish your final video.
Before recording, prepare your screen, close private information, check your microphone, and decide exactly what viewers need to see. Small improvements such as deliberate cursor movement, clear audio, organized windows, and short rehearsals can make your recordings easier to understand without requiring professional equipment.
Choose your recording method based on the task rather than using the same tool for everything. Quick demonstrations may need only Snipping Tool, gameplay can work well with Game Bar, and edited tutorials may benefit from Clipchamp. With a little preparation, Windows 11 provides enough flexibility for most everyday screen recording needs.
FAQs
Does Windows 11 have a built-in screen recorder?
Yes. Windows 11 includes built-in recording options such as Snipping Tool and Xbox Game Bar. Microsoft Clipchamp can also provide screen recording and editing features for supported users and configurations.
What is the shortcut to record the screen on Windows 11?
Windows key + Shift + R opens the Snipping Tool screen recording interface on supported Windows 11 installations. Xbox Game Bar users can press Windows key + Alt + R to start or stop recording.
Where are Xbox Game Bar recordings saved?
Xbox Game Bar normally saves recordings as MP4 files inside the Captures folder located within your Windows Videos folder. You can open that folder through File Explorer to find previous recordings.
Can I record my voice while recording the Windows 11 screen?
Yes. Recording tools can use your microphone when the correct permissions and audio settings are enabled. Always create a short test recording before an important session to confirm your voice is captured clearly.
Which screen recorder is best for Windows 11 beginners?
Snipping Tool is one of the easiest options for short screen captures, while Xbox Game Bar works well for apps and games. Clipchamp is more useful when you also need to edit the video.