

Different Ways to Take a Screenshot on Windows 11
Windows 11 gives you several built-in ways to capture what appears on your screen. You can take a screenshot of the entire display, one active window, or only a selected area. Depending on the method you choose, the screenshot may be copied to your clipboard, saved automatically as an image file, or opened in the Snipping Tool for editing.
The quickest screenshot methods use keyboard shortcuts such as Print Screen, Windows + Print Screen, and Windows + Shift + S. Windows 11 also includes the Snipping Tool, which provides more control over what you capture. Understanding the differences between these options helps you choose the fastest method for work, troubleshooting, tutorials, gaming, or everyday computer use.
Most screenshot methods require no additional software. Windows already includes the tools needed to capture, crop, annotate, and save images from your screen. Once you learn a few simple shortcuts, taking screenshots becomes much faster, whether you need to save an error message, share instructions, or keep a visual record of something important.
Take a Screenshot With the Print Screen Key
The Print Screen key, often labeled PrtSc, PrtScn, or something similar, is one of the traditional ways to capture a Windows screen. Pressing it usually copies an image of your entire display to the clipboard. The screenshot is not necessarily saved as a file immediately, so you need to paste it into another application before saving it.
After pressing Print Screen, open an application such as Paint, Word, an email editor, or another program that accepts images. Press Ctrl + V to paste the screenshot. You can then crop, edit, resize, or save the image depending on what you need to do with the captured screen.
On some laptops, you may need to press the Fn key together with Print Screen because manufacturers assign multiple functions to the same keyboard button. If pressing PrtSc appears to do nothing, try Fn + PrtSc. Keyboard layouts vary, so the exact combination may depend on your computer model and function-key settings.
Use Windows + Print Screen to Save Screenshots Automatically
If you want Windows 11 to capture the entire screen and save the image automatically, press Windows + Print Screen. The display may briefly dim to indicate that a screenshot has been taken. Unlike the standard Print Screen method, you normally do not need to paste the image into another program before accessing it.
Windows generally saves these screenshots inside the Screenshots folder within your Pictures directory. Open File Explorer, choose Pictures, and then open Screenshots to find the captured files. Windows automatically gives each screenshot a numbered filename, making this method convenient when you need to capture several screens quickly without stopping to save each one manually.
This shortcut is especially useful when documenting a multi-step process or collecting screenshots for later editing. Because each capture becomes a separate file, you can continue working without repeatedly opening Paint or another application. Just remember to review the folder afterward and rename important images so they are easier to identify later.
Capture Part of the Screen With Windows + Shift + S
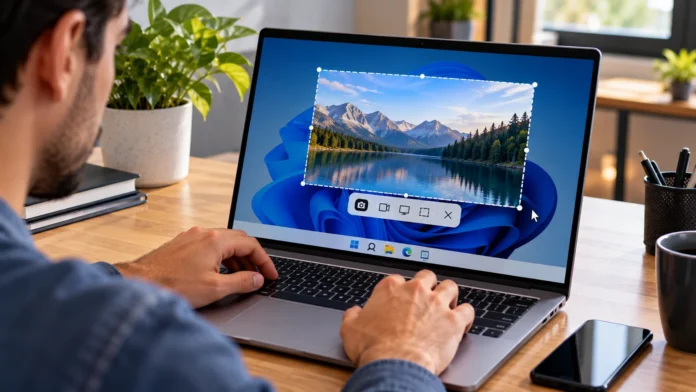
Windows + Shift + S is one of the most useful screenshot shortcuts in Windows 11 because it lets you capture only the area you actually need. Press the three keys together, and the screen will darken while a small capture toolbar appears. You can then choose a rectangular area, freeform region, individual window, or full-screen capture.
For a rectangular screenshot, click and drag your mouse around the content you want to capture. When you release the mouse button, Windows copies the image to the clipboard. A notification may also appear, allowing you to open the capture in the Snipping Tool where you can crop, highlight, draw, or save the screenshot.
This method is ideal when you do not want unnecessary desktop icons, browser tabs, or unrelated windows appearing in your image. Instead of capturing the entire display and cropping afterward, you can select the relevant content immediately. It is especially helpful for tutorials, support messages, documents, and situations where you need to share only a specific part of your screen.
Take Screenshots With the Windows 11 Snipping Tool
The Snipping Tool is Windows 11’s built-in application for taking and editing screenshots. You can find it by opening the Start menu and searching for “Snipping Tool.” After launching the app, click New to begin a capture, then select the portion of the screen, window, or full display you want to save.
The Snipping Tool offers several capture modes, including rectangle, window, full-screen, and freeform options. This flexibility makes it useful when keyboard shortcuts do not provide enough control. After taking the screenshot, the image opens inside the app where you can review it before saving or copying it elsewhere.
Editing tools allow you to crop the screenshot, draw on it, highlight important details, or make simple annotations. These features are particularly useful when creating instructions or pointing out an error to someone. Once finished, use the save button to choose a filename, image format, and destination folder for your screenshot.
Screenshot Only the Active Window
Sometimes you need to capture only one application instead of everything visible on your desktop. In that situation, click the window you want to capture so that it becomes active. Then press Alt + Print Screen, and Windows will copy an image of the active window to your clipboard without including other open applications.
You can then open Paint, Word, an email, or another compatible application and press Ctrl + V to paste the screenshot. From there, save or edit it as needed. This approach is particularly useful when sharing software errors, settings panels, browser windows, or application interfaces without exposing other information on your desktop.
Using Alt + Print Screen can also reduce the amount of cropping required later. Instead of manually selecting an area after capturing the entire display, Windows isolates the selected application for you. If the shortcut does not work on your laptop, try pressing Fn along with Alt and Print Screen because some keyboards require the additional function key.
How to Take a Delayed Screenshot on Windows 11
A delayed screenshot is useful when you need to capture menus, tooltips, dropdowns, or other elements that disappear when you click elsewhere. Open the Snipping Tool and look for the delay option before starting the capture. You can choose a short delay, giving yourself time to open the menu or screen state you want to photograph.
After selecting the delay, click New and prepare the content you want to capture. Once the selected time has passed, Windows will activate the screenshot interface. You can then choose the relevant area or window while the menu, tooltip, or temporary interface element remains visible on the screen.
This feature is especially useful for creating tutorials and troubleshooting guides. Standard screenshot shortcuts may close an open menu as soon as another key or application is selected. A timed capture avoids that problem by allowing you to prepare the screen before Windows begins the actual screenshot process.
Where Windows 11 Screenshots Are Saved
Where a screenshot is stored depends on the method you use. Windows + Print Screen normally saves images automatically in the Pictures > Screenshots folder. Other methods, such as Print Screen or Alt + Print Screen, usually copy the screenshot to the clipboard instead, which means you must paste and save the image yourself.
Screenshots taken with Windows + Shift + S may remain temporarily on the clipboard until you paste them somewhere or open the Snipping Tool notification. If you close everything without saving or pasting the screenshot, you may lose that capture. Saving important screenshots immediately prevents confusion, especially if you plan to take several images in sequence.
If an important screenshot file was accidentally removed from your computer, standard recovery options may still be worth checking. Our guide on how to recover deleted files explains practical Windows recovery methods in more detail. Keeping screenshots organized in clearly named folders can also reduce the chance of accidental deletion.
How to Edit and Annotate Screenshots
Windows 11 makes basic screenshot editing straightforward through the Snipping Tool. After taking a capture, open it in the app and use the available pen, highlighter, crop, and other annotation controls. These tools are useful when you need to emphasize a button, circle an error, or remove unnecessary parts of the screenshot before sharing it.
For more detailed editing, you can open the screenshot in Paint. Paint allows you to resize images, add text, draw shapes, crop sections, and make other basic adjustments. This is often enough for simple tutorials, work documentation, or social media images without requiring advanced image-editing software.
When editing screenshots, avoid adding more information than necessary. A clean image with one or two clear annotations is usually easier to understand than a screenshot covered with arrows, text, and highlights. If the image contains personal information, account details, emails, or confidential content, crop or cover those areas before sending the screenshot to anyone else.
How to Screenshot Multiple Monitors
If your computer uses two or more displays, pressing Print Screen may capture all active monitors as one large image. This can be useful when you want a complete record of your desktop setup. However, the final screenshot may be extremely wide, so you might need to crop it before using or sharing the image.
When you need only one monitor, Windows + Shift + S provides greater control. Select the desired screen area manually, or use an appropriate capture mode to isolate the content you need. Alt + Print Screen is another helpful option when the application you want to capture is active on one particular monitor.
Multi-monitor users should also check screenshots carefully before sharing them. Another display may contain messages, documents, browser tabs, or private information that you did not intend to capture. Selecting only the necessary area is generally safer and produces a cleaner image than automatically capturing every connected display.
What to Do If the Print Screen Key Is Not Working
If the Print Screen key does not capture anything, first check whether your laptop requires the Fn key. Many compact keyboards combine Print Screen with another function, so Fn + PrtSc may be necessary. You can also test Windows + Shift + S to determine whether Windows screenshot functionality is working normally despite the keyboard shortcut problem.
Another possibility is that Print Screen has been configured to open the Snipping Tool rather than immediately copying the full screen. Windows settings can change how the key behaves. This is not necessarily an error; it simply means pressing Print Screen may launch a screen-selection interface instead of silently placing a full-screen image on the clipboard.
Restarting the computer can resolve temporary keyboard or clipboard issues. If the shortcut still fails, test another keyboard if available and check whether other keys are behaving normally. You can continue using the Snipping Tool from the Start menu even when the physical Print Screen key on your keyboard is unavailable or damaged.
Best Screenshot Method for Different Situations
For capturing the entire screen quickly, Windows + Print Screen is one of the easiest choices because the screenshot is saved automatically. It works well when documenting multiple screens or collecting images rapidly. Standard Print Screen is useful when you simply want to copy the full display and immediately paste it into a document or message.
Windows + Shift + S is generally the most flexible method for everyday screenshot needs. It lets you capture a specific region without saving unnecessary desktop content. Alt + Print Screen is better when you need only one active application, while the Snipping Tool provides additional options for delayed captures, annotations, and more controlled editing.
The best method depends on what you plan to do after taking the screenshot. If speed matters, use keyboard shortcuts; if precision matters, use Snipping Tool or Windows + Shift + S. Learning two or three of these methods is usually enough to handle nearly every screenshot situation you encounter on a Windows 11 computer.
Tips for Taking Clear and Useful Screenshots
Before capturing your screen, close unnecessary windows and remove information that should remain private. A cluttered screenshot can make instructions harder to understand and may accidentally reveal sensitive details. Position the important content clearly and enlarge text or interface elements when necessary so the final screenshot remains readable after being shared or resized.
Choose the smallest capture area that still provides enough context. If you are demonstrating a setting, showing the relevant window and nearby controls may be more useful than capturing the entire desktop. When reporting an error, include enough surrounding information for another person to understand where the message appeared and what application produced it.
Finally, use descriptive filenames when saving screenshots you plan to keep. Names such as “Windows-network-settings” or “printer-error-message” are easier to recognize than automatically generated numbers. Organizing screenshots into folders by project, date, or purpose also makes them easier to find when you need them again weeks or months later.
Conclusion
Learning how to take a screenshot on Windows 11 gives you several convenient options for capturing information from your computer. You can use Print Screen for a full display, Alt + Print Screen for the active window, Windows + Print Screen for automatic saving, or Windows + Shift + S for selecting a specific area.
The Snipping Tool provides even more control by combining different capture modes with basic editing, annotation, and delay features. It is particularly useful when creating tutorials, documenting problems, or capturing temporary menus. Once you understand where screenshots are saved and how the clipboard works, the entire process becomes much easier.
There is no single screenshot method that is best for every situation. Choose the shortcut or tool based on whether you need speed, automatic saving, precise selection, or editing options. With a few simple keyboard combinations and the built-in Snipping Tool, Windows 11 provides everything most users need to capture and share their screen efficiently.
FAQs
What is the fastest screenshot shortcut on Windows 11?
Press Windows + Shift + S to quickly capture a selected area of your screen. For an automatically saved full-screen image, Windows + Print Screen is usually the most convenient shortcut.
Where do screenshots go on Windows 11?
Screenshots taken with Windows + Print Screen generally appear in Pictures > Screenshots. Other shortcuts may copy the screenshot to your clipboard until you paste or save it manually.
How do I screenshot only one window in Windows 11?
Click the window you want to capture and press Alt + Print Screen. Windows copies only the active window to your clipboard, allowing you to paste it into Paint, Word, or another application.
Can I take a screenshot without the Print Screen key?
Yes. Press Windows + Shift + S or open the Snipping Tool from the Start menu. Both methods allow you to take screenshots without using the physical Print Screen button.
Why does my screenshot disappear after using Windows + Shift + S?
The screenshot may have been copied only to your clipboard rather than permanently saved. Open the Snipping Tool notification or paste the capture into an application, then save it as an image file.