
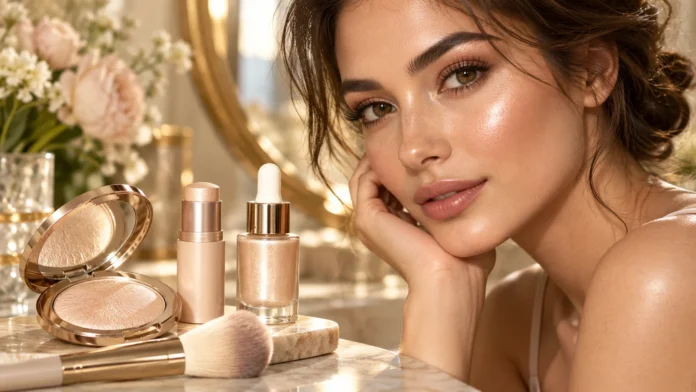

How to Choose the Best Highlighter
The best highlighter for a radiant makeup look adds light where you want it without making the skin appear greasy, glittery, or heavily textured. Start by deciding on the finish you like: a soft, natural sheen, a dewy glow, or a more noticeable reflective highlight. Your everyday makeup style can help narrow the options.
Consider how much shine you want and where you plan to apply the product. A subtle highlighter can brighten the cheekbones for daytime makeup, while a more intense formula may suit evening looks or photos. If you want one versatile product, choose a buildable formula that looks smooth in a thin layer.
Check the shade in natural light before choosing. A highlighter should complement your complexion and blend into your makeup rather than sit on top as a stripe. If possible, test a small amount on your cheekbone and view it from different angles to see how its color and shine look on your skin.
Which Highlighter Formula Should You Pick?
Powder highlighter is easy to control and works well over a set makeup base. It is available in subtle satin finishes as well as reflective, high-shine options. Use a soft brush and build the color gradually, especially if the powder is very pigmented or contains visible shimmer.
Cream highlighter often gives skin a fresh, natural-looking glow. It can be applied with fingers, a sponge, or a brush, then gently tapped into place. Cream formulas usually layer smoothly over liquid or cream makeup, but apply them with light pressure so you do not disturb your foundation.
Liquid highlighter can be mixed with moisturizer or foundation for an all-over glow, or tapped onto specific areas for a concentrated sheen. Balms and sticks offer convenient, direct application and can create a glossy finish. Try the texture before buying, since a very emollient formula may feel slippery or move makeup underneath.
Match Highlighter to Your Skin Type
If your skin is dry, a cream or liquid highlighter may give you a comfortable, hydrated-looking finish. Look for a formula that blends without emphasizing dry patches. Apply a small amount over well-moisturized skin, and avoid rubbing the product back and forth if your base makeup is prone to pilling.
Oily skin can still wear highlighter; the key is choosing a finish that feels balanced. A powder formula with a fine, smooth texture can add radiance without making the whole face appear shiny. Place it only on selected areas, and keep the center of the face more matte if that is your preference.
Combination skin may benefit from using different formulas in different areas. You could apply powder highlighter to a cheekbone and a cream product to a drier area, as long as the layers blend well together. Test combinations in thin layers first, since mixing textures can sometimes cause base makeup to separate.
Choose a Highlighter Shade for Your Complexion
A highlighter shade should look harmonious with your skin tone. Champagne, soft gold, rose gold, peach, and bronze are common options, but the best choice depends on the color that blends naturally into your complexion. The finish matters too: an undertone that looks flattering in a compact may appear different once applied.
Fair skin can look luminous with pale champagne, pearl, or soft pink shades. Light-to-medium complexions may suit peach, warm champagne, or gentle gold tones. Medium and deep skin tones can often wear richer gold, bronze, copper, or rose-gold shades that remain visible without leaving a pale cast.
Think about undertone as well as depth. Warm undertones may pair naturally with golden or peachy highlighters, while cool undertones can complement pink or pearl shades. Neutral undertones often have flexibility across both groups. When unsure, compare swatches on your cheek rather than relying only on product photos or the color in the packaging.
Pick a Finish for the Glow You Want
A satin highlighter gives a restrained sheen with little or no visible sparkle. It is a useful choice when you want your complexion to look naturally bright rather than obviously highlighted. Satin formulas can also work well for everyday makeup because they reflect light softly and are easy to apply with a light hand.
A shimmer highlighter contains reflective particles that catch the light more noticeably. Fine shimmer can create a polished glow, while larger glitter particles may be more visible on the skin. If you prefer a smooth finish, check the product in direct light and look for finely milled shimmer rather than chunky sparkle.
A glossy or wet-look finish can make the skin appear fresh and dewy. Balms and some liquid formulas often create this effect, though they may feel tackier than powder. Consider how the finish wears over the day and whether your hair tends to stick to products placed along the cheekbones.
Where Should You Apply Highlighter?
The tops of the cheekbones are a classic placement because they naturally catch light. Apply a small amount above the area where you place blush, then blend the edge toward the temple. Keeping the product focused on the high point helps the glow look intentional rather than spreading shine across the whole cheek.
You can also add highlighter to the brow bone, inner corners of the eyes, or the center of the eyelids. A tiny amount may brighten these areas, but avoid applying too much near textured skin or fine lines if you prefer a smoother appearance. Use a smaller brush or fingertip for precise placement.
The bridge or tip of the nose and the Cupid’s bow are optional areas. A narrow highlight down the nose can look polished, while a bright dot on the tip may draw more attention. Apply sparingly and check your face from the front and side so the result fits your features and makeup style.
Apply Highlighter Smoothly with the Right Tools
A small tapered brush gives you control when applying powder highlighter to the cheekbones or brow bone. A fan brush can distribute a very light layer, while a dense brush may create stronger shine. Start with the softest tool you have and add more product only if the finish needs extra intensity.
Cream and liquid highlighters can be blended with clean fingers, a makeup sponge, or a synthetic brush. Fingers warm the product and can help it melt into the skin, while a sponge presses it gently into place. Use tapping motions instead of dragging to reduce the chance of lifting foundation.
The amount of product on your tool can change the result dramatically. Pick up a little, tap off excess, and apply it in thin layers. If the highlighter looks too strong, blend its edges with a clean sponge or a small amount of foundation rather than layering more products over the area.
Layer Highlighter with Foundation, Blush, and Contour
Highlighter usually goes on after foundation and concealer, so you can see which areas need extra brightness. If you use a powder highlighter, applying it after setting powder may help it blend more evenly. For cream or liquid formulas, work over a compatible base and blend before the product sets.
A balanced cheek combines color and light without creating obvious bands. Apply blush to the cheeks, then add highlighter above it and blend the border between them. Keep the brightest point on the upper cheekbone, or adjust the placement to suit your preferred makeup look.
If you are also using contour, place it where you want shadow and highlighter on areas you want to emphasize. For a simple walkthrough of facial placement, see this beginner contouring guide. Blend each product separately before softening any edges where the shades meet.
Make Your Highlighter Last Longer
A smooth, well-prepared base can help highlighter wear more evenly. Apply skincare and sunscreen first, let them settle, then use foundation or skin tint as usual. If your complexion products tend to move, lightly set the areas around your highlight while leaving the cheekbone itself ready for application.
Use a thin layer and avoid applying highlighter over skin that feels slippery or damp from skincare. Cream and liquid formulas may last better when pressed into the base instead of rubbed across it. If you want stronger wear, some people layer a small amount of powder highlighter over a compatible cream formula.
A setting spray can help makeup look more blended, though it may not make every formula last longer. Touch up only where the glow has faded, and avoid repeatedly adding product over oil or sweat. Blot first if needed, then apply a small amount with a clean finger or brush.
Common Highlighter Mistakes to Avoid
Using too much product is one of the quickest ways to make highlighter look harsh. A highly reflective stripe can distract from the rest of your makeup, especially in bright daylight. Begin with a thin layer and check the result from a normal viewing distance before deciding whether you need more.
A shade that is too light or too contrasting can leave a visible cast, while chunky glitter may emphasize texture. Test both the color and the particle size before buying, if possible. Highlighter should catch light smoothly; it does not need to be the brightest point on your entire face.
Applying shimmer across areas where you do not want extra attention can change the balance of your makeup. Avoid sweeping a reflective formula over every part of the face unless you deliberately want an all-over glow. Keeping shine focused on a few high points often creates a more polished, radiant look.
How to Find a Highlighter for Everyday Wear
For everyday makeup, look for a highlighter described as buildable, finely milled, or natural-looking. These qualities can make it easier to control the finish, though labels alone do not guarantee how a product will perform. Check swatches or test a small amount to see how it looks on your skin.
Think about where and how often you will use it. A compact powder can be convenient for quick application and touch-ups, while a cream stick may be easy to carry in a makeup bag. If you wear minimal makeup, a sheer liquid or balm can add a fresh sheen without requiring several other products.
When comparing options, consider the formula, shade range, finish, packaging, and how the highlighter works with products you already own. You do not need the most intense or expensive option to get a radiant result. Choose something comfortable, easy to blend, and suitable for the look you want to create.
Conclusion
The best highlighter for a radiant makeup look is one that suits your skin, complexion, and preferred finish. Powder, cream, liquid, and balm formulas can all work well when you apply them in thin layers and blend them into a compatible makeup base.
Choose a shade that complements your undertone, then focus the glow on areas you want to bring forward, such as the cheekbones or inner corners of the eyes. Fine shimmer or satin finishes can offer a softer everyday effect, while glossy or stronger reflective formulas create more noticeable radiance.
Test the product in natural light and adjust the amount to suit the occasion. A small, well-placed highlight can brighten your makeup without overpowering it. With the right formula and placement, you can create a smooth glow that looks balanced and comfortable on your skin.
FAQs
Which type of highlighter is best for a natural glow?
Cream and liquid highlighters can give a fresh, skin-like sheen, while satin-finish powders offer a soft glow. Choose a buildable formula and apply a small amount to the cheekbones.
Where should I apply highlighter?
Apply it to the tops of the cheekbones for a classic glow. You can also use a little on the brow bone or inner corners of the eyes, depending on your makeup style.
Is powder or cream highlighter better?
Powder highlighter works well over a set base and is easy to control. Cream highlighter often blends smoothly over liquid or cream makeup and can create a dewy finish.
How do I choose a highlighter shade?
Choose a shade that blends naturally with your complexion and undertone. Try a small swatch in natural light, since a product’s color in its packaging can look different on your skin.
Can I wear highlighter with textured skin?
Yes. Choose a finely milled or satin formula and apply it sparingly to smoother areas, such as the upper cheekbones. Avoid layering a heavy shimmer over texture you do not want to emphasize.