
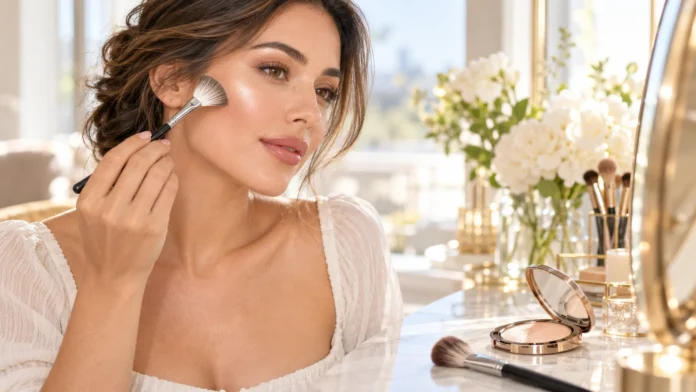

What Highlighter Does
Highlighter catches light on selected areas of the face, adding dimension and a luminous finish. It can make cheekbones look more prominent or give the skin a fresh glow, depending on the formula and placement. The aim is usually to create a subtle reflection that complements your complexion, not a bright stripe that draws attention away from the rest of your makeup.
The easiest way to avoid overdoing highlighter is to start with less product than you think you need. Build the shine gradually, then check your face in natural light before adding another layer. A highlighter that looks subtle indoors may appear much brighter near a window or under direct sunlight.
Your preferred finish matters as much as the amount you apply. A soft satin glow can work well for everyday makeup, while a more reflective finish may suit evening looks or photography. If you are choosing a formula, this guide to highlighters for a radiant makeup look can help you compare options.
Prepare Your Skin and Makeup Base
Smooth, comfortable skin gives highlighter a more even surface to reflect from. Start with skincare that suits your skin, and allow moisturizer or sunscreen to settle before applying makeup. If the skin feels slippery or tacky, highlighter may move the base underneath or gather in areas you meant to keep smooth.
Apply foundation and concealer in thin layers, blending them before adding highlighter. You do not have to create a completely matte base, but an even foundation layer helps you see where the product is going. If you use setting powder, apply only what you need so the highlighter does not catch on an overly dry or heavy base.
Consider how luminous your other makeup products already are. Dewy foundation, glossy blush, and a shimmery eyeshadow can add plenty of reflection on their own. When several products have shine, use less highlighter or apply it only to one area, such as the upper cheekbones, to keep the overall finish balanced.
Choose a Shade and Finish That Suit You
A highlighter shade should complement your skin tone and look natural when it catches the light. Champagne, pearl, rose, peach, and golden tones are common options, but there are no strict rules about who can wear each color. Test the shade on your face when possible, since packaging and indoor lighting can distort its appearance.
Pay attention to undertone and depth as well as color. A shade that is too pale may leave a noticeable cast on deeper skin, while one that is too dark may look like a streak rather than a highlight. The most wearable option often blends into the complexion and reflects light without looking like a separate strip of color.
Finish affects how intense the glow appears. Fine shimmer can provide a soft sheen, while larger particles or metallic finishes are more reflective and visible. For daytime or textured skin, a subtle satin highlighter may be easier to wear; for a stronger evening look, you can build a brighter finish in small layers.
Pick the Right Highlighter Formula
Powder highlighter is often applied with a brush and can be built up gradually. It may work well over a set foundation, especially when you want a soft, controlled glow. Choose a finely milled powder if you prefer a smooth finish, and tap off excess product before it touches your face.
Cream and liquid highlighters can look more skin-like because they blend into a flexible base. Use a fingertip, sponge, or small brush to tap the product onto the skin. These formulas are usually easiest to apply before setting powder, since rubbing them over a powdered base may create patches or disturb your foundation.
Formula choice depends on your routine, comfort, and desired effect. A beginner might find a powder easier to control with a fluffy brush, while someone who likes dewy makeup may prefer a cream. If your makeup tends to move, test the highlighter with your usual foundation and observe how it wears during the day.
Use Tools That Give You Control
The tool you use can change how much highlighter ends up on your face. A small tapered brush can place powder along the cheekbone with precision, while a fluffy brush spreads it more softly. For cream or liquid products, a sponge or fingertip can press a thin layer into the skin.
Pick up a little product and tap off excess powder before applying it. With liquid or cream formulas, place a small dot on the back of your hand first, then pick up a portion using your chosen tool. This creates a buffer between the product and your face, making it easier to control the amount.
Avoid sweeping a loaded brush back and forth across the cheek. Press or lightly sweep the highlighter where you want it, then blend the edges with a clean brush or sponge. If the glow looks too intense, a clean tool can diffuse it without adding more foundation or removing the rest of your makeup.
Apply Highlighter to the Cheekbones
The upper cheekbones are a popular place to apply highlighter because they catch light naturally. Start near the outer cheek, above the blush, and work toward the temple. Keep the product on the raised area rather than bringing it down toward the center of the cheek, where natural skin texture can be more visible.
Use a small amount and blend the edges until the highlight fades into your complexion. You should see a soft reflection when you turn your face, rather than a distinct stripe when looking straight ahead. If the product is very bright, apply it only to the highest point of the cheekbone instead of covering a wide area.
Placement can vary depending on your face shape and makeup style. Some people prefer a narrow highlight along the cheekbone, while others like a diffused glow that connects with blush. Start with the smaller placement, check it from different angles, and expand the area only if the finish still looks balanced.
Highlight the Nose, Brow Bone, and Cupid’s Bow Sparingly
A little highlighter on the bridge of the nose can create a fresh, light-catching detail. Use a small brush or fingertip to apply a thin line or a tiny amount near the upper bridge. Avoid covering the entire nose, since a broad, reflective area may look oily or draw attention to texture.
The brow bone can take a very small amount of highlighter beneath the arch. Blend it into the surrounding skin rather than placing a bright stripe under the whole eyebrow. If your eyeshadow already has shimmer, you may not need highlighter in this area at all.
A touch on the cupid’s bow can add dimension above the upper lip, but use a light hand. Too much shine there may make the area look wet or emphasize texture around the mouth. These smaller placements are optional, so choose one or two details instead of highlighting every part of the face.
Layer Highlighter Over Blush and Foundation
For most routines, highlighter goes after foundation and blush so you can see where extra light is needed. Cream or liquid highlighter usually blends more easily before setting powder, while powder highlighter typically sits best on a lightly set base. Follow the product texture and use tapping motions to help preserve the makeup underneath.
Keep highlighter separate from areas where you want a more natural or soft-focus finish. For example, if you prefer matte-looking skin around the nose or center of the forehead, leave those areas alone. Placing shine only on selected high points makes the glow look intentional rather than spreading shimmer across the whole face.
If you are layering highlighter with blush or bronzer, leave a little space between the products and then blend their edges. Overlapping too much can create a metallic-looking patch or muddy the color. A small amount of highlighter above the blush often gives enough dimension without competing with the cheek color.
Adjust Highlighter for Skin Texture and Skin Type
Highlighter reflects light, so it can make texture more noticeable when applied over pores, fine lines, or dry patches. If you have textured skin, choose a fine, smooth formula and use it sparingly on the areas where the surface looks even. Avoid applying thick layers directly over bumps or flaky skin.
For oily skin, a subtle highlighter can still work, but choose the placement carefully. If your face already becomes shiny through the day, focus on the upper cheekbones and avoid areas that tend to look oily, such as the sides of the nose or center of the forehead. A powder formula may offer more control for some people.
Dry or mature skin may look fresh with a flexible cream or liquid highlighter, provided the formula does not cling to dry areas. Prep the skin well and press the product in gently rather than rubbing. No skin type has to avoid highlighter; adjusting the finish and amount can make the glow more comfortable.
Common Highlighter Mistakes to Avoid
Applying too much at once is the most common reason highlighter looks overdone. Highly reflective formulas can appear subtle in a compact and much brighter on the face. Begin with a thin layer, check the finish in natural light, and add more only where you still want extra reflection.
Using the wrong shade or placement can also make the product stand out in an unflattering way. A shade that is too pale may look chalky, while a large patch across the cheek can emphasize texture. Test the color on your face and keep the application focused on areas that naturally catch light.
Another mistake is using a heavy hand while blending. Rubbing a cream product can lift foundation, and repeatedly sweeping powder can spread shimmer beyond the intended area. Use gentle taps or light strokes, then stop once the edges look soft; over-blending can move the product or make the whole face look shiny.
Create a Subtle Glow for Day or a Brighter Evening Look
For everyday makeup, keep the application simple: choose one high point, such as the upper cheekbone, and use a soft finish. A small amount can add dimension without looking overly glittery in daylight. Check the result near a window, since natural light gives you a more realistic view of the shine.
For evening makeup, you can build a more noticeable glow by layering the product gradually. Apply a light base layer, assess it from different angles, and add a little more to the cheekbones if needed. A brighter finish can work well under lower lighting, but it should still blend smoothly with the rest of your makeup.
For photos or special events, remember that lighting changes how highlighter appears. Flash photography can make reflective products look more intense, while dim lighting may reduce their visible glow. Test your makeup under similar lighting before an event, and bring a clean sponge or brush to soften any area that looks too bright.
Conclusion
Applying highlighter without overdoing it comes down to choosing a suitable shade and finish, using a small amount, and placing it only where you want light to reflect. The upper cheekbones are an easy place to begin, while nose, brow bone, and cupid’s bow highlights are optional.
Use a formula and tool that work with your foundation, then blend the edges gently. If your skin has visible texture or becomes shiny during the day, keep the application especially light and focused. Check your makeup in natural light before adding more.
A subtle glow can still add plenty of dimension. Start with one area, build gradually, and adjust the finish for your skin and occasion. With a little practice, highlighter can complement your makeup without taking over the look.
FAQs
Where should beginners apply highlighter?
Start on the upper cheekbones, above your blush. Use a small amount and blend the edges so the glow looks soft when viewed straight on and catches light when you turn.
How do I stop highlighter from looking too shiny?
Apply a thin layer only to selected high points, such as the cheekbones. Avoid areas that naturally become oily, and check the result in daylight before adding more.
Should highlighter go before or after powder?
Cream and liquid highlighters usually blend best before setting powder. Powder highlighter generally works well over a lightly set base, applied with a soft brush.
Can highlighter emphasize skin texture?
Yes. Reflective products can draw attention to pores, fine lines, or dry patches. Choose a finely milled or smooth formula and use a light layer on even areas.
What highlighter finish looks most natural?
A fine, satin finish often gives a subtle glow without visible glitter. Apply a small amount and blend it into the skin for a soft, natural-looking reflection.